
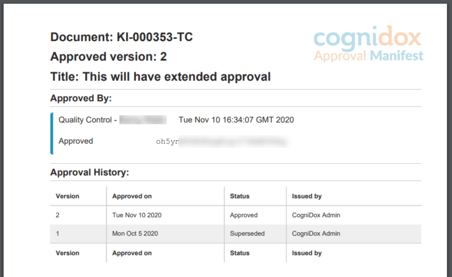
When a document is approved using the Extended Approval plugin, an extra PDF page is generated from an HTML approval manifest template. This page is appended to the approved document's PDF.
Videos in this article
Cognidox provides a default HTML approval manifest template. Built into this template is a background image that includes the Cognidox logo.
What can you customise?
Cognidox provides a default template, but you can:
- Edit the template layout and content
Modify the default template or create your own from scratch. You can download the default template from the Extended Approval plugin configuration page. - Add your company logo
Embed your logo directly in the HTML, or use a PDF background for consistent branding. - Preview your design
Test your template using the Template Preview tool before uploading it to Cognidox for approval.
Watch the video
Using a PDF Background
For extra flexibility, you can add a PDF background file — similar to a master page — that will appear behind the approval manifest content.
This is especially useful for adding logos, headers, or watermarks. Note, however, that it's the HTML template that defines which fields (like document name, approval date) appear in the approval manifest.
Using your own company logo
There are various ways to include your own company logo in the approval manifest:
- Replace the entire background-image line in the HTML template with a CSS Background version of your company logo
- Replace the entire data:image/ Data URI string with one that corresponds to a base64 encoded version of your company logo.
Use an online tool like dopiaza for making the data URI from an existing image file.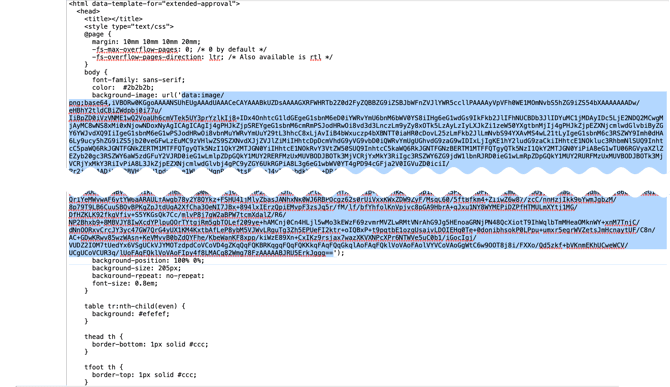
Uploading Your Custom Template
Before Cognidox can use your template:
- Upload your HTML approval manifest template to Cognidox.
- If you're using a PDF background, upload that too.
- Approve both files in the usual way.
- Select them on the Extended Approval plugin configuration page, and set the correct page size and orientation.
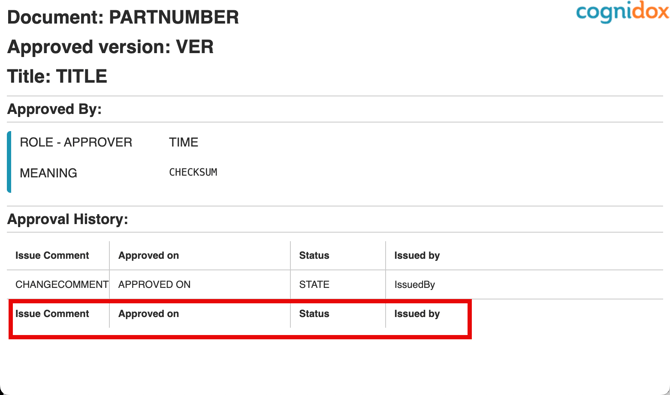
Fields You Can Use
Templates support a wide range of document and approval fields — for example:
<span data-template-field="partnum">Part number</span>
This will automatically insert the document’s part number when the manifest is generated.
- Date fields can be formatted using the data-date-format attribute. The values available in the format are listed here.
- A full list of available fields can be found in the online help.
An example that includes Issue Comments:
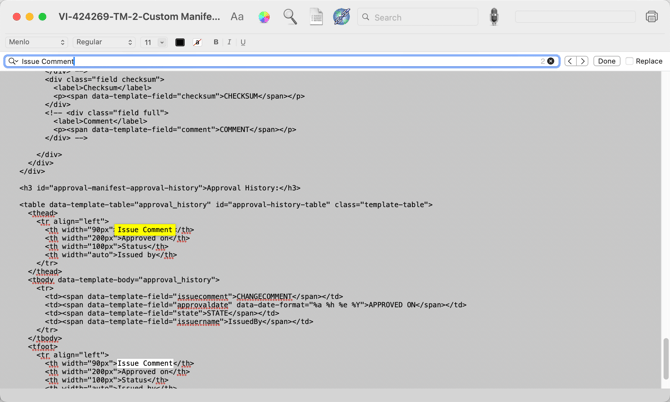
And here's the manifest html file open in a text editor, showing the fields:
Fonts
By default, your template can use system serif, sans-serif, or monospace fonts.
If you want to use custom fonts, you can embed them in your template using @font-face with a data URI (TTF format only).
Need more information?
- If you want a full text version of the instructions, they are in the online help.
- If you need more information on approvals, check out the other articles: